Gallery View
When participating in a Zoom meeting, you will find it useful to understand “Active Speaker” view and “Gallery” view. In gallery view small video images of participants are displayed in a grid or stack.

When the screen is too small to accommodate all the video images, angle characters ( < > ) appear on either side, or on top and bottom allowing you to page through the collection and see everyone.
On an iPhone or Android device, you can swipe to page through:

If you have a large enough display, you can see everyone at once (up to 49 participants. On a PC or Mac, click the up-caret next to the video icon and select “Video settings…” On the options list, check “Display up to 49 participants…”. You may have to scroll down to find it.
Your gallery view will look like this:

Active Speaker View
In “Active Speaker View” the video screen for the participant who is speaking is expanded be the central frame in the screen. Switching between views is a little different on each device.
Switch Views on Windows or Mac
On a keyboard device such as PC or Mac it looks like this:

Note the button in the upper right with a grid Icon labeled “Gallery View”. You may click (tap) this to change from active speaker view to gallery view:
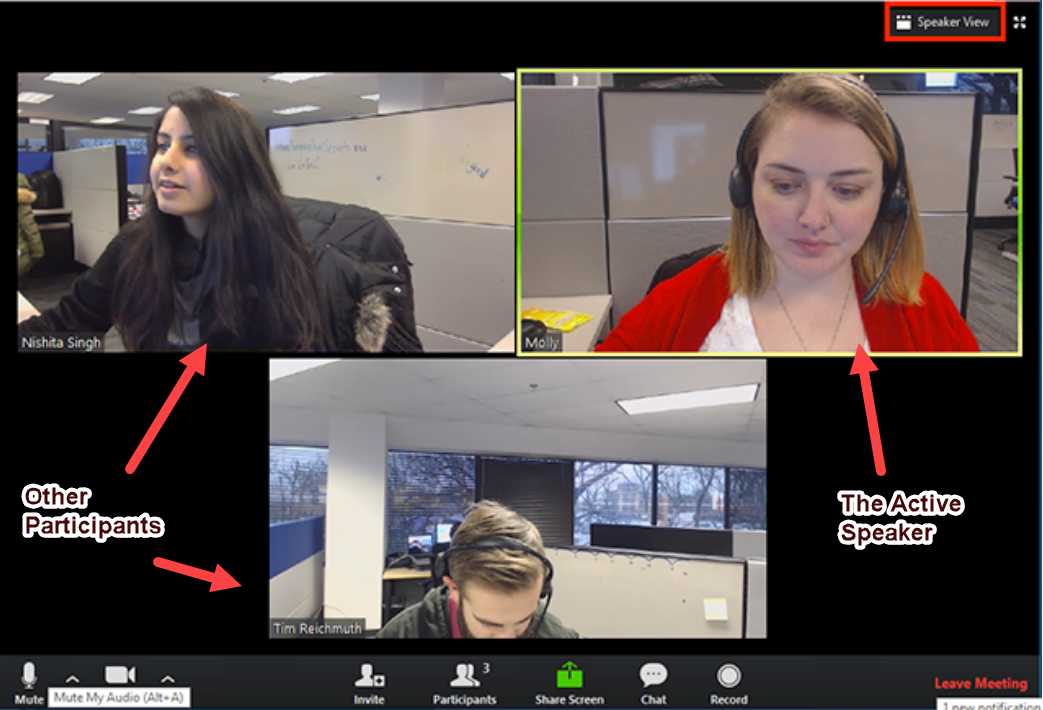
In gallery view the active speaker is outlined in yellow. A similar button is displayed in the upper corner with a different icon labeled “Speaker View”. Clicking this, of course, returns to active speaker view.
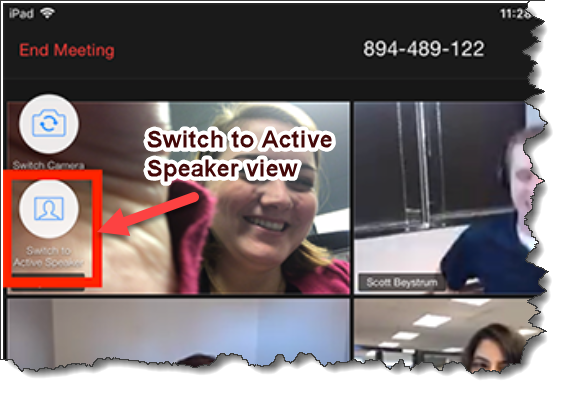
Switch Views on iPad
On an iPad, the buttons that switch between active speaker and gallery view appear as round icons on the left:

Switch Views on a iPhone or Android Device
On an iPhone or Android phone or pad, in Gallery view, swipe right until you come to Speaker View. From Speaker view, swipe left to get to gallery view.
More information
For more information including a description of “Pinning a Video”, see the Zoom Help:
https://support.zoom.us/hc/en-us/articles/201362403-Active-Speaker-Video-Layout-